1. Set a timer, preferably in another room. I set the timer for 17 minutes, and walking down the hallway to turn it off helps me be more mindful of my body. A 5 minute break every hour doesn’t do it for me. Yes, at first frequent breaks interrupted my flow, but now they are thoroughly part of it.
2. Take a shoulder break by putting a 2 soft balls or empty 16oz water bottles, or small rolled up towels under my arms(anywhere from the pit to nearer the elbow) for a few minutes. This position allows my shoulders to rest while different muscles are engaged, and I can keep mosaicing. The first time I read about this in Franklin’s Relax your Neck, Liberate Your Shoulders, I couldn’t imagine it helping, but it felt great. I look funny, but, oh well.
3. Wear a padded glove on your nipping hand.
4. Work on several different projects to vary the types of tasks I am doing. Invariably, too much of one thing, whether it be nipping, gluing or grouting, increases my pain levels.
5. Remember to breathe. When I’m focusing intensely, I tend to hold my breath, and tense my muscles.
6. Take a day off from the studio. Yes, I love making mosaics. Yes, I have orders to fill. But to sustain my craftsmanship in the long term, I need to give my body a chance to decompress.
7. Stand up to nip and glue. This may not work for everyone, that’s the nature of ergonomics, not one size fits all. But for me, having a tall drafting table and standing as I work allows me to get better leverage with nipping, using the big muscles in my arms and shoulders rather than just my hands.
8. Lift up your work to avoid crafters’ hunch. I elevate my work in progress on a box on top of my drafting table. Sometimes I sit down to work, if standing is getting uncomfortable, and use a drawing table with an adjustable top, and elevate the surface to an angle just enough to get a better view without the tesserae sliding off. If you glue the bottom row first, that can catch any errant pieces.
9. Invest in a hammer & hardie. This traditional mosaic cutting tool is an alternative to wheeled mosaic nippers, and you can cut chunks of smalti with the tap of the hammer. The more types of tools, the options you have.
10. Consult a physical or occupational therapist who can guide you with appropriate exercises and adaptations. I had an overzealous day with scissors several years ago when I was making collages, and woke up unable to extend my pointer finger. A hand therapist was instrumental in helping me protect my hands.
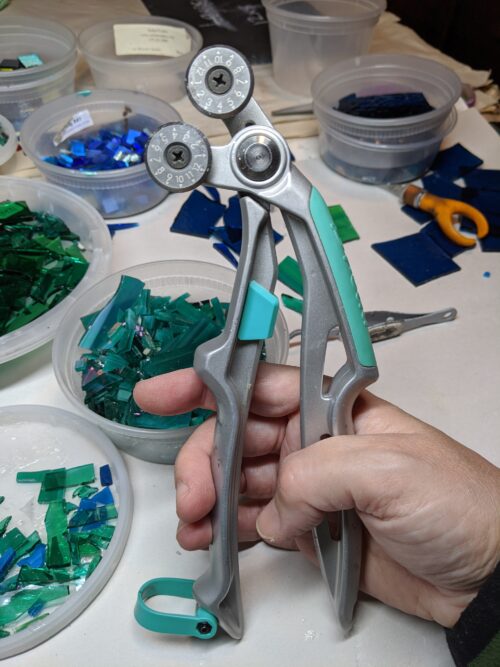
11. [2021] The Breda Nipper came on the market and is made of cast aluminum. It is light and you hold it in a more natural wrist position. The blades are replaceable. It was an investment compared to other wheeled nippers, but well worth it. I no longer need a padded glove for nipping.
Related Posts
Margaret Goldie: Teacher of the Alexander Technique
Ted Hallman: The Alexander Technique in the Art Studio
An Artist’s Experience with the Alexander Technique: Interview with Robert Rickover


I’m glad you have found a way to deal with the hazards of mozaic work – your art is beautiful and it would be shame if pain got in the way!
Kathryn
I hope that maybe these ideas will work for other artists, since I know how hard it is to pace myself when I’m doing something I love!
M.