Click here to see the finished number!
Commission your number
Related:
Over at Stratoz’s Blog:
Click here to see the finished number!
Related:
Over at Stratoz’s Blog:
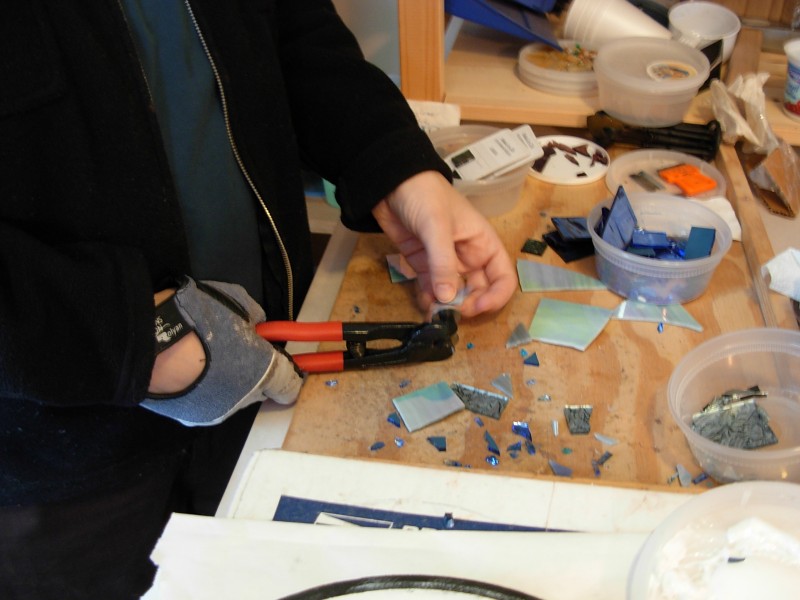

1. Wheeled Mosaic Nippers
These are the scissors of the mosaic world. Tile nippers will crush glass, but wheeled mosaic nippers allow you to shape the glass. The black handled ones are Leponitts, considered the top of the line in nippers. The red handled ones are sometimes available at craft stores. I use both, because they each have their own strengths.
2. Dental Tools
Invaluable for cleaning the last bits of grout and glue from your mosaic. I like lots of levels in my mosaics, and this means some pieces get buried and I need to dig them out after grouting. Widget Supply Company has a nice selection(and I love the name!). I also use the Fiskars Fingertip Craft Knife for particularly stubborn bits of glue.
3. Tweezers
Glass is to be respected! To avoid the sharp edges and also to make precise placement, I use reverse action tweezers to pick up smaller pieces for dipping in glue. EKSuccess’ Tweezer Bee is my favorite. The tips are very pointy for precision, they are coated in non-stick finish which helps shed the glue, and a nice squishy padded handle.
4. Microfiber Cloths
When cleaning off grout, I skip the sponge idea, and use microfiber cloths. They have just enough tooth to remove grout haze, and can be used over and over.
5. Weldbond Glue
Non-toxic, washable, pvc white glue which dries clear, and which with some water and prodding, allows you take out pieces after they’ve already dried. Very helpful when you realize something needs to be adjusted! Read more about it: A mosaic artist’s friend.

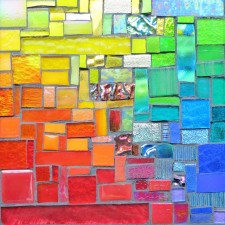
Discovering ways to work with color was pivotal in making my art. The first time I saw a color wheel I fell in love. Then in 2004, I read Nita Leland’s book Exploring Color which was like an infusion of pure energy. I was reminded of my color wheel love when I made the Rainbow Panel for the exhibit at Virago Baking Company, with all the delicious transitions between colors, and then Stratoz mentioned he was teaching about Maurice-Eugene Chevreul in his science class. Chevreul was a chemist hired by the Gobelin Dyeworks of Paris to brighten up their colors. What’s fascinating is his conclusion that the dyes themselves weren’t the problem, but how close together the different colors were woven together by textile companies.

Color is a chameleon. One color can look different depending on what other color surrounds it. It’s like a magic trick, transforming one thing into another. Colors that are opposite from each other on the color wheel are called complementary–red/green, orange/blue and yellow/violet–are particularly intense when side by side, as if they were almost vibrating. For even more fun, there are triads and tetrads. Stratoz was inspired to create his Tetradic Heart after teaching about Chevreul.

My log cabin quilt collage cards from my previous post were an initial experiment with red and green and searching through magazines for color was a revelation. Every page became a palette.
Log Cabin is still one of my favorite designs to work with. Many of my mosaic trivets are variations on the Log Cabin quilt block, and wonderfully suited to playing with contrasting colors, as quilters have known for eons.
What color combinations do you enjoy? If you make things, are there certain colors you gravitate to in your work? I’d love to hear about more color love.
Related:
Over at Stratoz’s Blog:

It was a delight to meet these four women who signed up to take Glass Mosaic Basics through the Pennsylvania Guild of Craftsmen. The class took place at the Goggleworks in Reading, PA, and there is no quicker way to feel inspired than to be surrounded by such creative energy, especially on Sunday when it was Second Sunday Open House.
We had our own studio building and plenty of room to spread out. Every student finished something, grout and all! And it was a pleasure to spend a weekend talking about our different aesthetics, the nature of creativity and planning a mosaic world tour, with theme weekends from Mexico, to Spain and Italy. . .maybe someday!


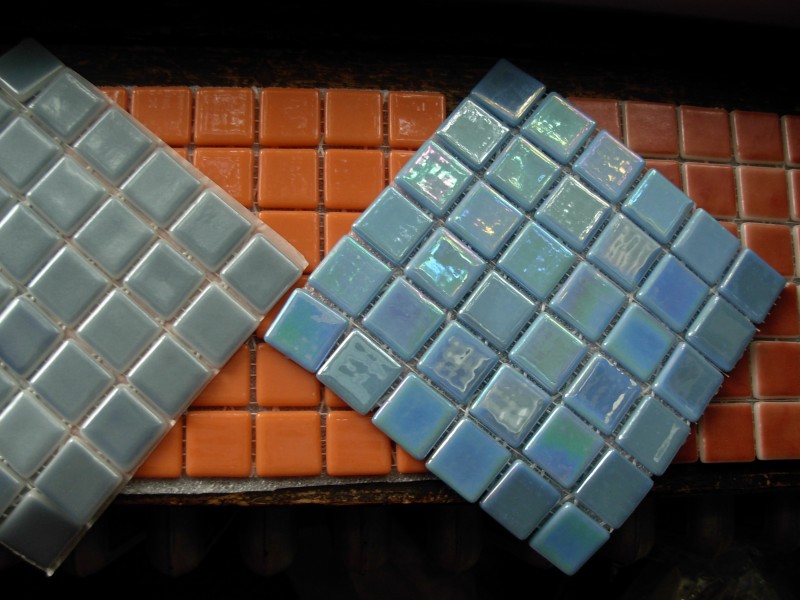
 I am always looking for new tesserae to create mosaics with, and when I saw the Calliope Series of Recycled Glass Tile I was hooked! The variegation is especially enticing, allowing for visual texture, and giving a lively feeling, in motion with swirls. The sheen is lightly iridized. According to Hakatai, the Oregon Importer of these tiles, they are 50% recycled glass, 90% of which is post-consumer. As soon as they arrived, I was in the studio experimenting.

I also have a sheet of Garden, in shades of blue and green.

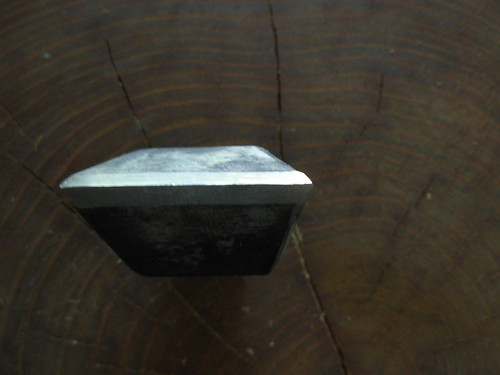
I had the mosaic cutting tool set of hammer and hardie for longer than I want to admit, waiting until I found a log to use as a base. Finally, I found Ted Frumkin‘s woodworking studio in Western PA, and he was able to take a piece of Catalpa just the right size and clean it up for me and ship it across the state, just in time for a monster snow storm!
Stratoz came charging up the stairs with a big box, and it was my log! We didn’t even get mail the day before that, so this was very exciting. He heaved the log up onto my drawing table, and now we need to drill a hole and sink the hardie. Then I will be set to use the traditional technique for cutting smalti, still favored in Italy.
I learned to use this tool at a mosaic workshop at Snow Farm: The New England Craft Program. You balance the piece of glass smalti on the finely honed edge of the hardie and tap it with the hammer and it shears into pieces. Smalti can be a challenge to nip with wheeled mosaic nippers, so I’m looking forward to getting to know my new tool!


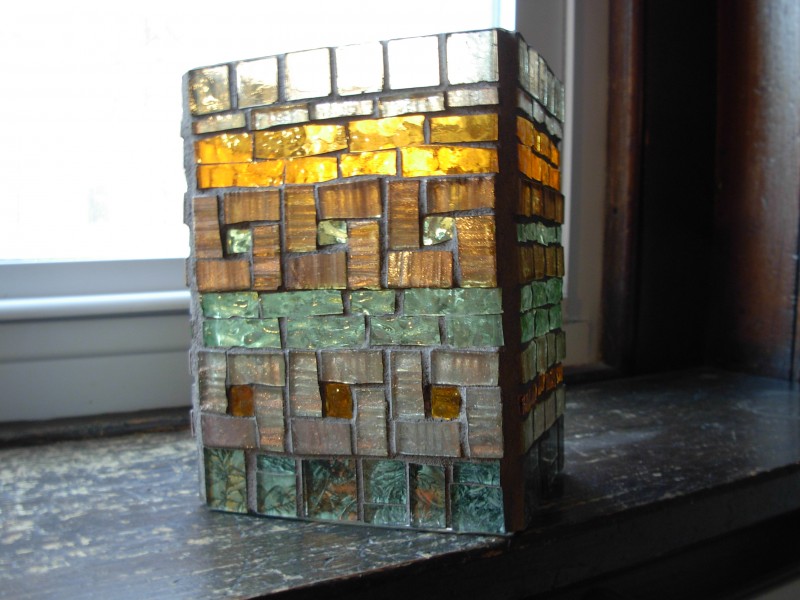

A friend commissioned a candle holder as a housewarming gift. She wanted sage green and earthtones, and it was a cool combination of colors to work with.
Most important with a candle holder is the need for translucence to really let the light shine. Weldbond can get trapped with no air when gluing glass to glass, and take months to turn from white to clear. Once I used silicone, but it was an oozing gooey mess, and the odor was strong. I realized I had a bottle of Mac Glue, which I had bought but hadn’t tried yet. Mac glue is thin, sort of like diluted hair conditioner, and has no vertical hold, but my base was square, I could do one side at a time laying flat. At first it didn’t seem to have any adhesive qualities at all! But after 1/2 hour or so it began to get tacky. It dried clear by the next day and didn’t ooze into the grout lines.
I used a combination of vitreous glass tiles swirled with coppery aventurine, which had an opalescent glow, and transparent stained glass for a more intense light. Because the bottom edge didn’t need to be translucent, I used VanGogh glass, which is clear glass painted on the back, and has a swirly texture.
My friend said the recipients loved it, and I am honored to have my work as part of their new home. May it bring them much light and joy!
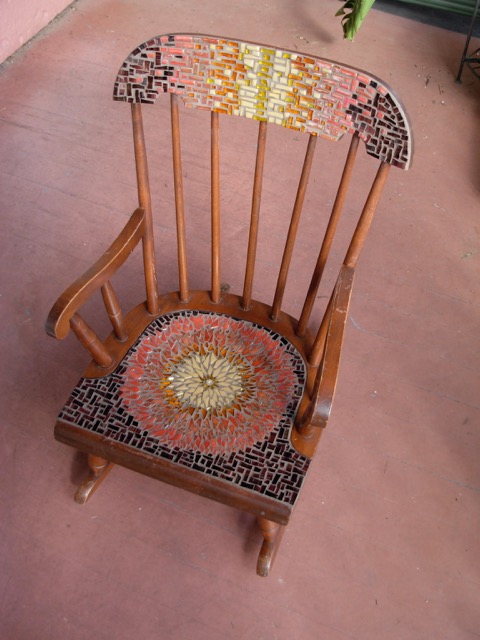
Part of the joy of making mosaics are all the cool tesserae available, like the recycled glass Organiks tiles. They are similar to a tile I started using from Spain, Vidrepur, which is also recycled glass. I was attracted to the tiles before I ever knew they were recycled from broken car windshields and bottles. They are extremely smooth, with rounded edges and corners. Some have color applied to the surface, like the ones at either end of the photo. Others have the color integrated into the glass mixture, all the way through. Unlike some types of vitreous glass tile, which can have an almost grainy texture with tiny pits in the surface, these tiles are “high definition” with the kind of sheen on marbles or other highly polished glass.
I used Vidrepur tiles in this rocking chair for the Phoenixville Chair-ity Auction. The center tiles are metallic gold, and the two outer rings are shades of red and orange.
I found this video from Vidrepur that shows their recycling process if you want a peek at how they go about transforming glass recyclables into gorgeous tile. Check out the groovy jazz flute soundtrack!
Related Post: